基于Hexo的个人博客搭建

使用 Hexo 博客框架快速搭建个人博客,配合 Github Pages 实现博客部署及域名访问

Hexo安装

  • 前置环境:安装Node.jsgit

配置本地git 仓库

找到Git安装目录,打开Git Bash窗口,设置user.name和 user.email

1
2
git config --global user.name niceday
git config --global user.email niceday@163.com

配置Git公钥

1
ssh-keygen -t rsa -C "niceday@163.com"

连按三个回车后,得到生成的公钥文件 id_rsa.pub ,复制其中的内容,添加到Github的SSH KEY 中,添加完成后,使用以下命令查看是否添加成功

1
ssh git@github.com

Hexo搭建

Hexo 官方文档: 文档 | Hexo

进入创建好的 Blog 文件夹,右击选择 Git Bash here 打开命令窗口,输入以下命令

1
2
3
4
5
6
7
8
9
10
11
12
13
# 安装Hexo
npm install -g hexo-cli
# 检查安装是否成功
hexo -v
# 初始化hexo文件夹
hexo init blog
cd blog
# 新建一个文章
hexo new test_blog
# 生成静态页面
hexo g
# 启动服务器,本地预览 localhost:4000
hexo s

Hexo 主题安装

参考 Hexo Fluid 官方手册:Hexo Fluid 用户手册

Hexo 部署至 Nginx

Hexo 项目目录下,执行以下命令打包 Hexo ,生成 public 目录

1
hexo g

public 目录下的文件放至 nginx 的html 目录,启动 nginx 即可

Github Pages

GitHub 主页右上角加号 -> New repository :

  • Repository name 中输入 账号名.github.io
  • 勾选 “Initialize this repository with a README”

创建仓库后,默认自动启用HTTPS,访问地址为 https://账号名.github.io

部署 Hexo 到 Github Pages

在 Blog 文件目录下,输入以下命令

1
2
# 安装 hexo-deployer-git
npm run install hexo-deployer-git --save

安装完成后,修改同目录下_config.yml文件末尾部分

1
2
3
4
deploy:
type: git
repository: git@github.com:账户名/账户名.github.io.git
branch: main

完成后,运行以下命令,将Hexo部署到Github Pages,通过域名 https://账号名.github.io 可查看博客网站

1
hexo deploy

Github Action 实现自动化部署 Hexo

  1. 配置部署公钥

利用 ssh-keygen 生成公私钥

  • Github Pages 仓库 Settings -> Secrets -> Actions , 新建一个 HEXO_DEPLOY_PRIVATE_KEY 存放私钥

1654593294036

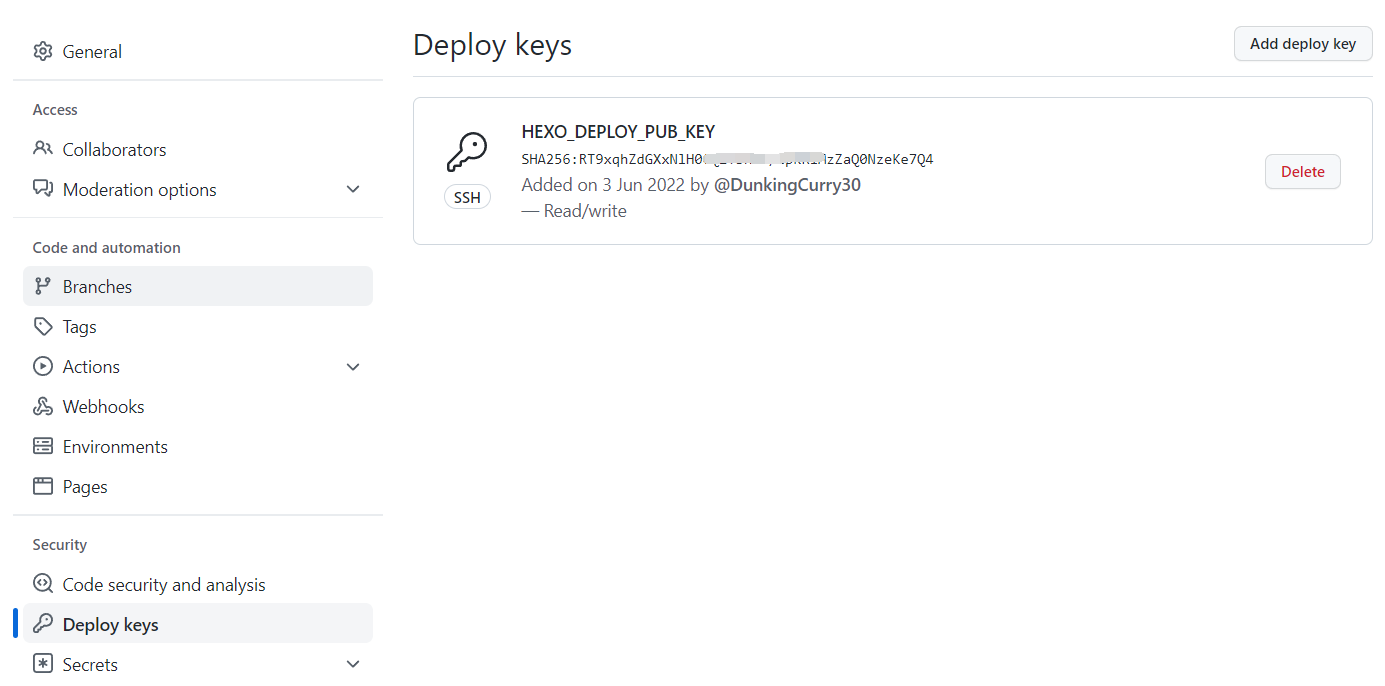
  • Pages 仓库 Settings -> Deploy keys ,新建一个 HEXO_DEPLOY_PUB_KEY 存放公钥

1654593824300

  1. 编写 Action

.github/workflows 新建 deploy.yml 文件,内容如下:

1
2
3
4
5
6
7
8
9
10
11
12
13
14
15
16
17
18
19
20
21
22
23
24
25
26
27
28
29
30
31
32
33
34
35
36
37
38
39
40
41
42
43
44
45
46
47
48
49
name: CI
on:
push:
branches:
- dev-dunkingcurry
jobs:
build:
runs-on: ubuntu-latest
strategy:
matrix:
node_version: [14.x]

steps:
- name: Checkout source
uses: actions/checkout@v2
with:
ref: dev-dunkingcurry

- name: Use Node.js ${{ matrix.node_version }}
uses: actions/setup-node@v1
with:
version: ${{ matrix.node_version }}

# 缓存node_modules,避免每次跑action都要重新下载
- name: Cache node modules
uses: actions/cache@v1
id: cache
with:
path: node_modules
key: ${{ runner.os }}-node-${{ hashFiles('**/package-lock.json') }}
restore-keys: |
${{ runner.os }}-node-

- name: Setup hexo
env:
ACTION_DEPLOY_KEY: ${{ secrets.HEXO_DEPLOY_PRIVATE_KEY }}
run: |
mkdir -p ~/.ssh/
echo "$ACTION_DEPLOY_KEY" > ~/.ssh/id_rsa
chmod 600 ~/.ssh/id_rsa
ssh-keyscan github.com >> ~/.ssh/known_hosts
git config --global user.email "DunkingCurry30"
git config --global user.name "123456789@qq.com"
npm install hexo-cli -g
npm install
- name: Hexo deploy
run: |
hexo clean
hexo g
  1. push 至 Pages 仓库

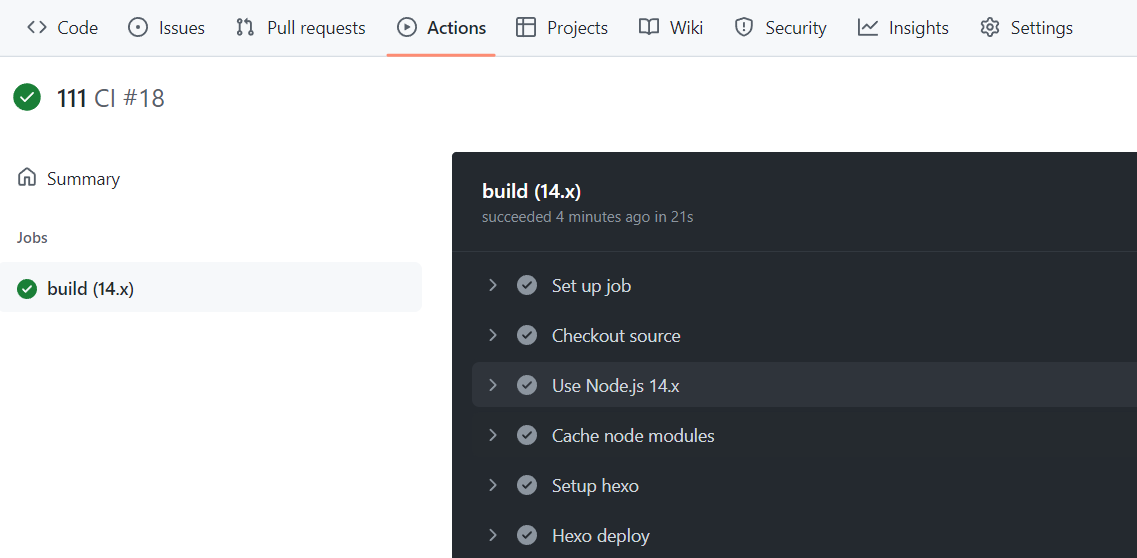
push 至 Pages 仓库后,在 仓库 Action 界面下查看自动化流水线

1654596600222

点击可查看每个步骤的执行信息

1654596296439

  1. 验证自动化部署结果

流水线显示执行成功后,通过域名 https://账号名.github.io 可查看博客网站内容,更新成功

1654584003746

至此,大功告成!

Hexo 提交代码同时部署至 云服务器Github Pages 可参考该篇文章: docker 部署 gitlab gitlab-runner 实现 CI


基于Hexo的个人博客搭建
http://dunkingcurry30.github.io/2022/06/07/基于Github个人博客搭建/
作者
Dunking Curry
发布于
2022年6月7日
许可协议